Creating Your Google Tag Manager Account Follow

Creating Your Google Tag Manager Account
Your website serves as not only the first impression for your visitors, but should be a powerful lead generator and conversion tool. And understanding how visitors interact with it is essential. Adding tracking codes to your site for that essential data has never been easier with Google Tag Manager because you can cut out the technical resource that was typically required.
You can use tag manager to monitor specific events like link clicks, file downloads or add depth tracking, and implement retargeting campaigns.
The Benefits of Google Tag Manager:
- You only have to manage one dashboard so that tracking can be done in one seamless spot
- Less reliance on developers to implement tags
- More consistent, accurate and automatic tagging
- Version control allows you to rollback any changes if anything breaks
Sign up for a free Google Tag Manager account by going here and clicking the “Sign Up for Free” button. You will need a Google account in order to sign up.
We strongly recommend using the same Google account you are already using to access your Google Analytics account.
Setup Account
1. Name your account. We recommend using the name of your brokerage.

2. Setup your Container
a. Container name: Use the main domain of your brokerage.
b. Where to Use Container: select Web
c. Click Create

3. Read through the Google Tag Manager Terms of Service Agreement. If you agree, click “yes” to confirm.
4. Ignore the screen that says “Install Google Tag Manager.” We will do this another way later on in the configuration process.
Creating Tags, Triggers and Data Layer Variables
Now that you have a container setup for your site, you need to tell Google Tag Manager how to track the requested information. The following steps will walk you through setting up the data layers, triggers and tags necessary for:
- Running your Google Analytics account through GTM
- Tracking the custom website events that are built into your Boston Logic by Propertybase website.
Creating a tag for Google Analytics
1. Click “Add a New Tag” from the workspace screen in Google Tag Manager.

2. Name your tag “Universal Analytics”

3. Under Tag Configuration, click the tag icon to choose a tag type and begin setup. Under Featured tags, select Universal Analytics.
4. Configure the tag with the following details:
- Track type: Page View
- Check the box that says, “Enable overriding settings in this tag”
- Add client tracking ID from Google Analytics (how to find your Tracking ID)

- Under “More Settings”
- Fields to Set : allowLinker and value should be false
- “Ecommerce” should be set to false
- “Advertising” should be set to true

5. Select a trigger for this tag.
Selecting a trigger tells Google Tag Manager when and where they should add this particular tag to your website. In this instance, we want the Universal Analytics tag to fire on all pages of your website.
Click on “Choose a trigger” and then select “All Pages.”

6. Save your tag.
Creating data layer variables and a tag for Custom Boston Logic event tracking
1. Creating data layer variables
a. From the main workspace screen of Google Tag Manager click on Variables in the left-hand column.
b. Under “User-Defined Variables,” click new.

c. Name the the variable eventCategory

d. Click on “Choose a variable type to begin setup”
e. Select “Data Layer Variable” under “Page Variables”
f. Enter eventCategory as the Data Layer Variable Name
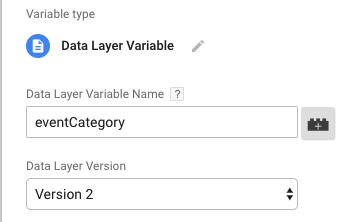
g. Click Save
h. Repeat steps B-G three more times, using the following values in place of eventCategory:
- eventAction
- eventLabel
- eventValue
2. Creating the tag for BL Custom Event Tracking
1. Click “Add a New Tag” from the workspace screen in Google Tag Manager.
2. Name the tag “BL Event Tracking”

3. Under Tag Configuration, click the tag icon to choose a tag type and begin setup. Under Featured tags, select Universal Analytics.
4. Configure the tag with the following details:
- Track type: Event
- Event Tracking Parameters: click the Lego-looking symbol and select the appropriate data layer variables for each parameter
- Category: eventCategory
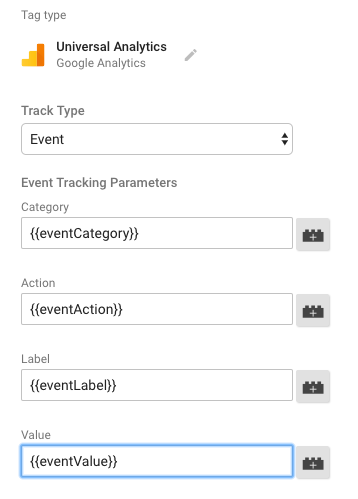
- Action: eventAction
- Label: eventLabel
- Value: eventValue
- Category: eventCategory
- Non-interaction hit should be set to false
- Check the box that says, “Enable overriding settings in this tag”
- Add client tracking ID from Google Analytics (how to find your Tracking ID )
- Under “More Settings” (click here for sample )
- “Ecommerce” should be set to false
- “Advertising” should be set to true
5. Create and select a trigger for this tag
- Click on choose a trigger for this tag
- Click the blue + in the upper right-hand corner to create a new trigger
- Name it “BL Event Tracking”
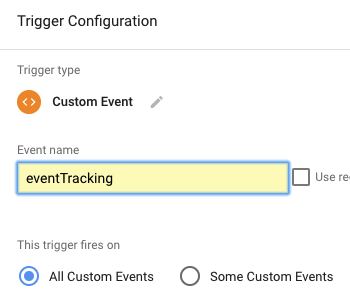
- Choose the trigger type: Custom Event
- Configure the trigger as follows:
- Event name: eventTracking
- For “This trigger fires on…” select, “All custom events”
- Click Save to save the Trigger
6. Click Save to save the new tag
Publishing Google Tag Manager to Your Propertybase Website
1. Publishing via Google Tag Manager
a. Go to your main Google Tag Manager workspace screen. In the upper right-hand corner, you should see a message that indicates how many workspace changes you have. Click “Submit.”

b. To keep an accurate activity history, use an easily understandable title and add a brief description about exactly what you changed or added to GTM.
c. Click Publish
d. Write down your Google Tag Manager ID, as indicated in blue in the screenshot above (format: GTM-XXXXXXX).
2. Enabling on Boston Logic’s backend
a. Log into the admin of your Boston Logic brokerage website.
b. Navigate to Settings > Marketing > Analytics Settings
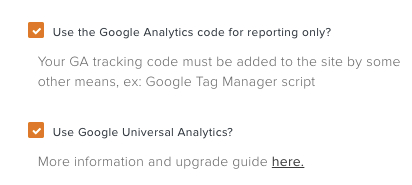
c. Under the Google Analytics section, check the box that says, “Use the Google Analytics code for reporting only?”
d. Check the box that says “Use Google Universal Analytics?” (this may already be enabled)
5. Under the Google AdWords section, enter the Google Tag Manager ID that you wrote down previously.
6. If you are implementing Google Tag Manager in part to get visibility into website traffic to your child sites, click the box that says “Use GTM code on all child sites.” This step is unnecessary if you do not have child sites.
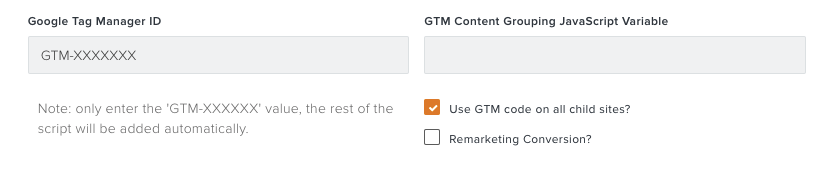
7. Save your settings